Jenkins and Gitlab integration: Difference between revisions
Jump to navigation
Jump to search
(Created page with "= Jenkins job configuration = # Create Jenkins job # Set up permissions thumb|center # Set up Git information thumb|center # Set...") |
No edit summary |
||
| Line 3: | Line 3: | ||
# Create Jenkins job | # Create Jenkins job | ||
# Set up permissions | # Set up permissions | ||
[[File:J-permissions. | [[File:J-permissions.png|center|thumb]] | ||
# Set up Git information | # Set up Git information | ||
[[File:J-git. | [[File:J-git.png|center|thumb]] | ||
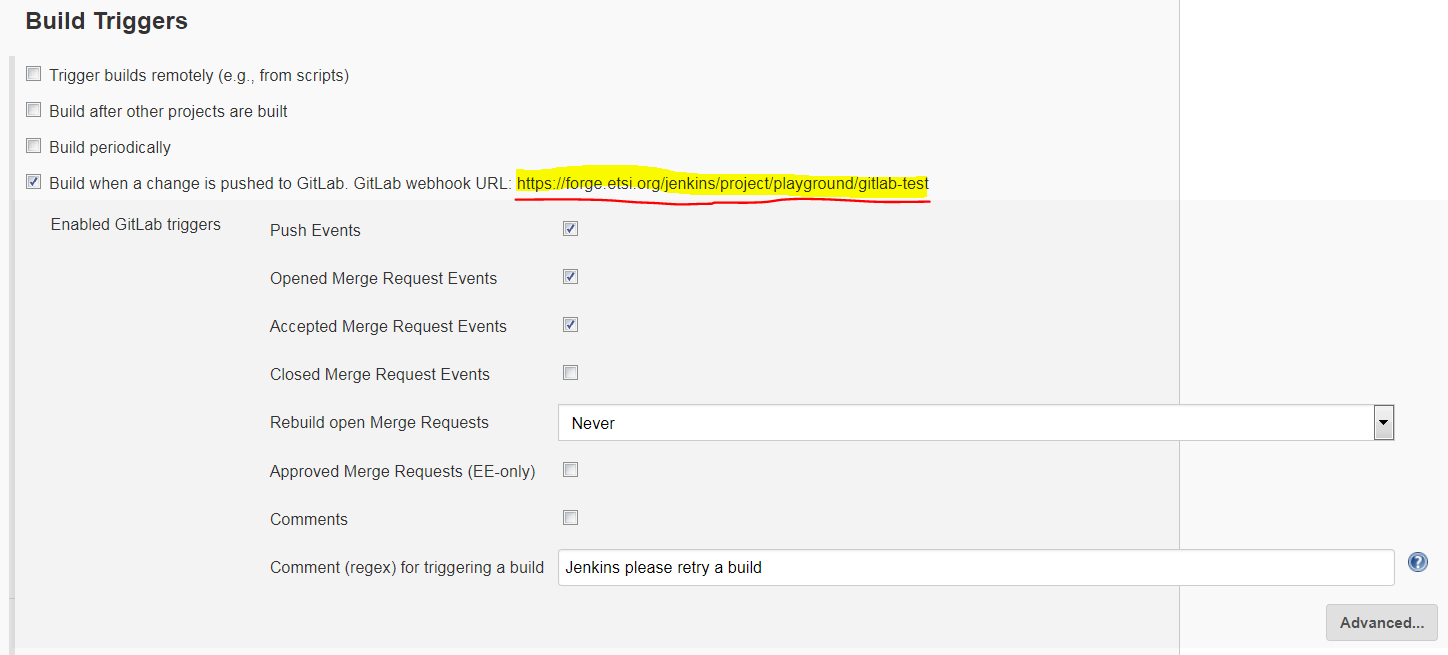
# Set up the trigger | # Set up the trigger | ||
[[File:J-trigger. | [[File:J-trigger.png|center|thumb]] | ||
#* Remember to take note of the link to be used as a hook | #* Remember to take note of the link to be used as a hook | ||
#* Important: Click on advanced and generate a secure token to be used in Gitlab | #* Important: Click on advanced and generate a secure token to be used in Gitlab | ||
# Set up post build actions | # Set up post build actions | ||
[[File:J-post. | [[File:J-post.png|center|thumb]] | ||
= Gitlab project configuration = | = Gitlab project configuration = | ||
Revision as of 16:25, 17 July 2018
Jenkins job configuration[edit | edit source]
- Create Jenkins job
- Set up permissions
- Set up Git information
- Set up the trigger
- Remember to take note of the link to be used as a hook
- Important: Click on advanced and generate a secure token to be used in Gitlab
- Set up post build actions
Gitlab project configuration[edit | edit source]
- Navigate to the project Integrations settings (e.g. [1])
- Insert the link generated by the Gitlab Plugin in Jenkins as the webhook uri
- Set the secret token
- click test and select "Push"


