How to use Gerrit review tool: Difference between revisions
Jump to navigation
Jump to search
(Created page with "<iframe src="//www.slideshare.net/slideshow/embed_code/key/Jn2CcV2oChAswI" width="595" height="485" frameborder="0" marginwidth="0" marginheight="0" scrolling="no" style="bord...") |
No edit summary |
||
| (3 intermediate revisions by the same user not shown) | |||
| Line 1: | Line 1: | ||
< | == Upload content with the web interface == | ||
<big> | |||
The example is taken from the [[NFV Specfest Wiki]]. | |||
Proceed withe the points below: | |||
# <span class="ext">Navigate to the project page where you want to upload your contribution, e.g. [https://forge.etsi.org/gerrit/#/admin/projects/nfv-specfest nfv-specfest]</span> | |||
#* If required, click on the <code>Sign in</code> link on the top right and the page to log in with your EOL or Forge credentials. | |||
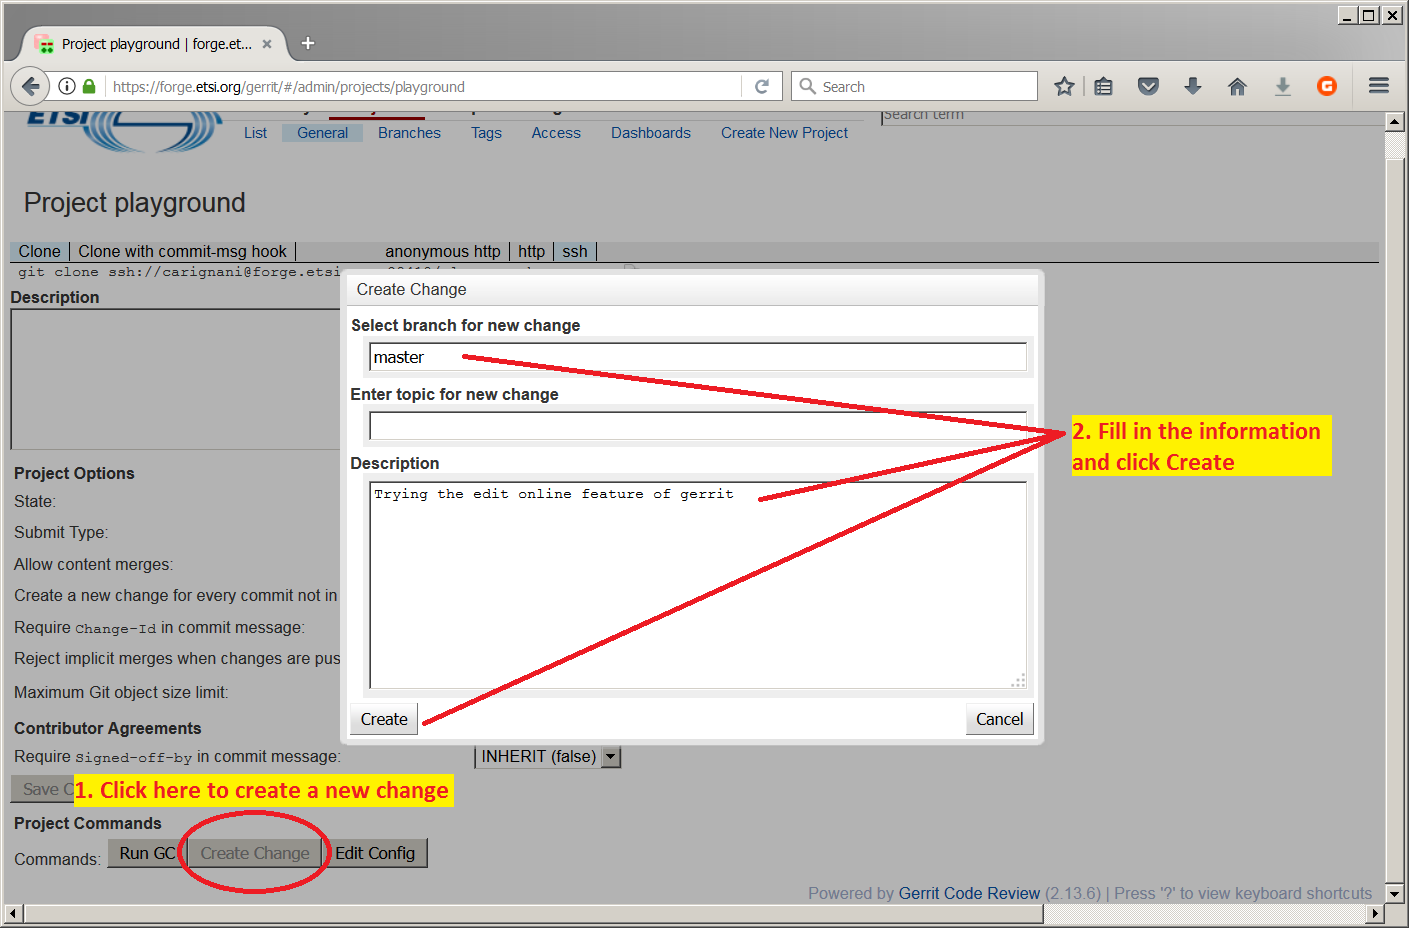
# Click <code>Create Change</code> button | |||
#* Enter Branch, e.g. ''master'' | |||
#* Enter Change topic. Topics are used to gather sets of Changes which are about the same feature. E.g. "specfest" | |||
#* Enter the description of the Change. | |||
#* Click on <code>Create</code> | |||
#* [[File:Gerrit-online-change-guide.png|700px|thumb|center|How to create a new Change in the Gerrit web UI]] | |||
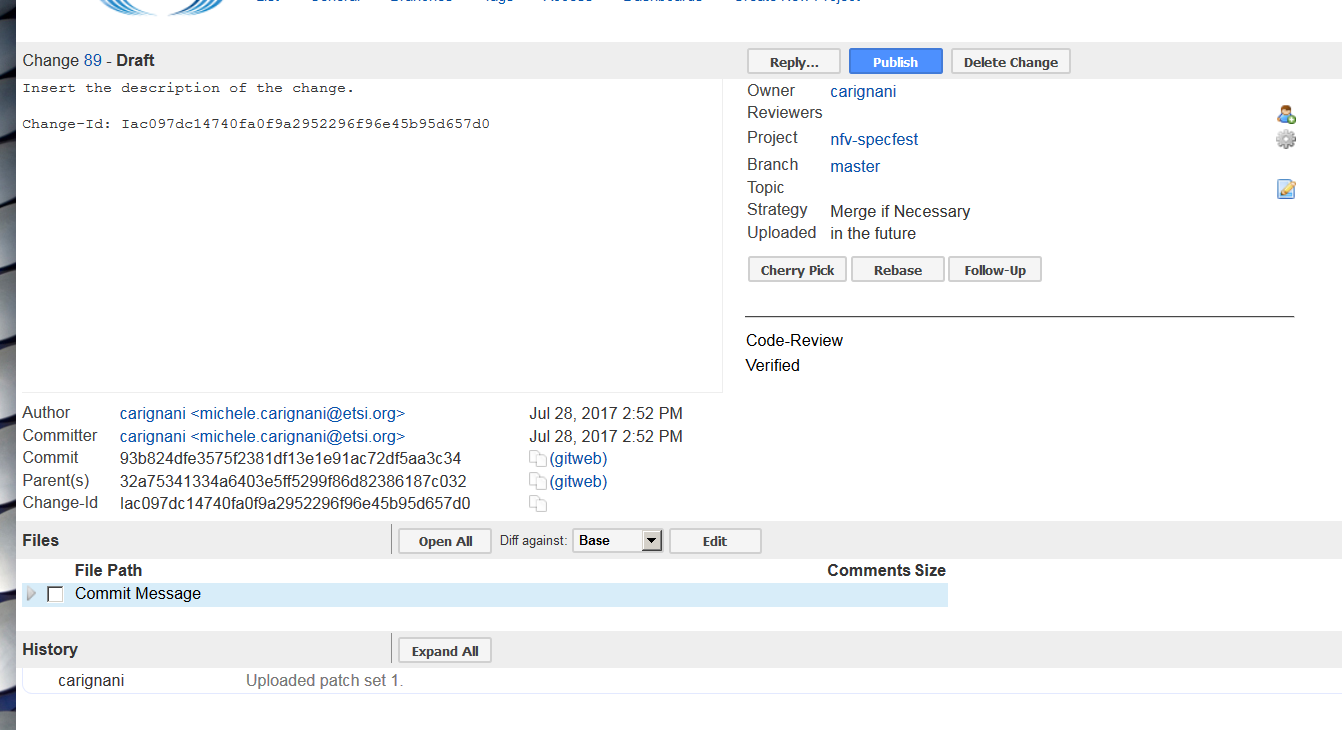
# Click <code>Edit</code> in the File list at the bottom of the page | |||
#* [[File:Gerrit-online-change-add-new-file1.png|700px|thumb|center|Click edit at the bottom]] | |||
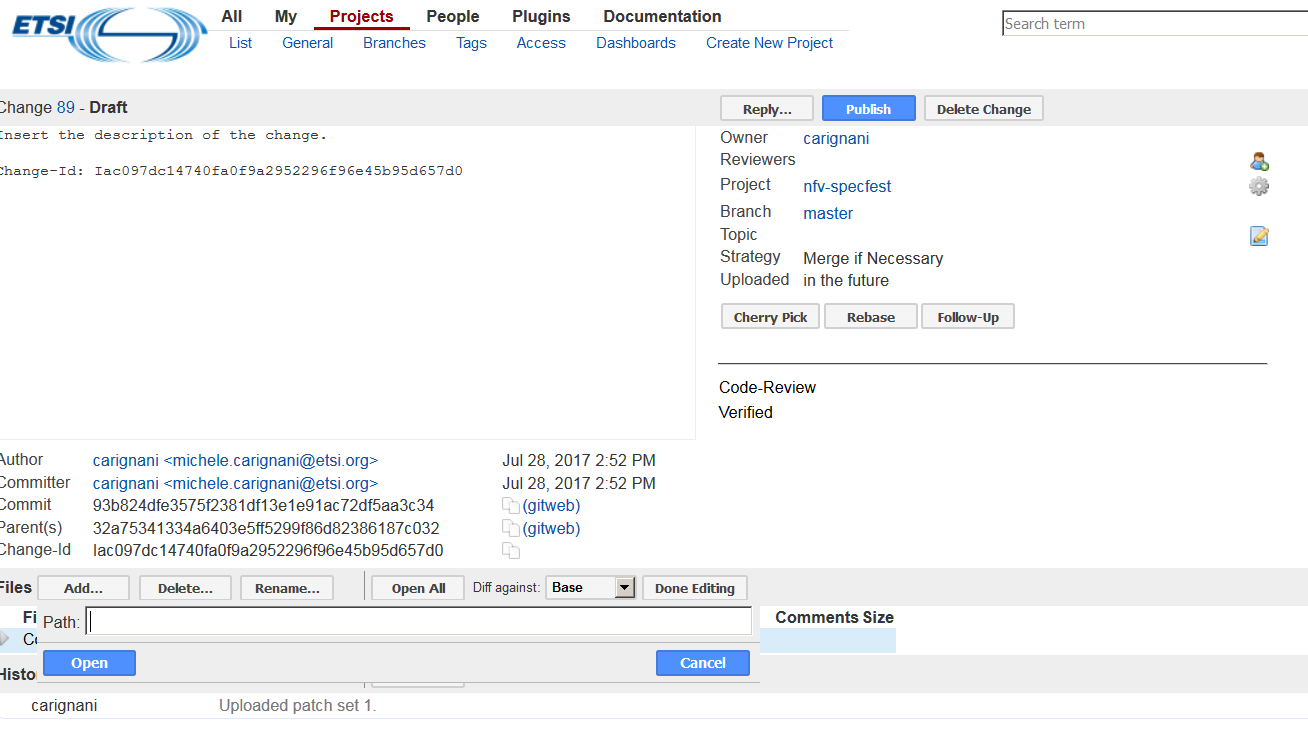
# Click <code>Add</code> to insert a new modification in a file | |||
#* Type a file path (folder and filename, e.g. "upload/jon_snow.yaml") and click <code>Open</code> button. | |||
#* [[File:Gerrit-online-change-add-new-file2.png|700px|thumb|center|Click Add and insert filename]] | |||
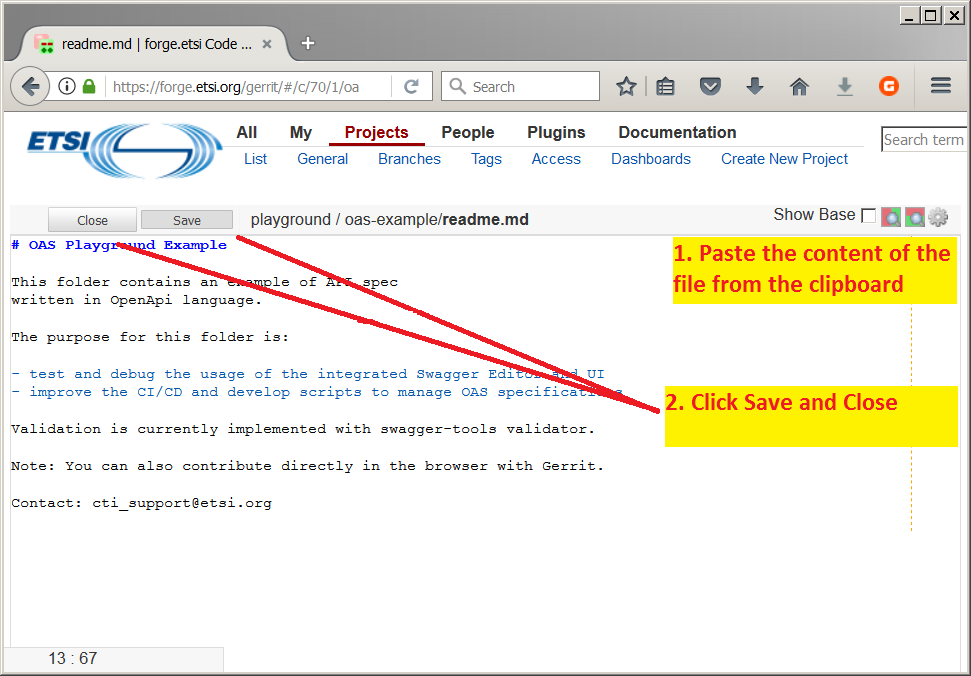
# Copy the content you want to submit and paste the content in the newly created file. | |||
# Click <code>Save</code> and then click <code>Close</code> | |||
#* [[File:Gerrit-online-edit-guide.png|700px|thumb|center|Editing a file in the gerrit web UI]] | |||
# Click the blue <code>Publish edit</code> button and then the <code>Publish</code> button on the top right of the page. | |||
#* [[File:Gerrit-online-change-add-new-file2.png|700px|thumb|center|Click Add and insert filename]] | |||
</big> | |||
== Enable notifications from specific projects or branches == | |||
Notification from changes in projects are configured via the [https://forge.etsi.org/gerrit/#/settings/projects Watched projects] page, available in the Settings. | |||
Find more information at Gerrit on [https://gerrit-review.googlesource.com/Documentation/intro-user.html#watch Watched projects documentation]. An extract: | |||
<pre> | |||
To get to know about new changes you can watch the projects that you are interested in. | |||
For watched projects Gerrit sends you email notifications when a change is uploaded or | |||
modified. You can decide on which events you want to be notified and you can filter the | |||
notifications by using change search expressions. | |||
For example 'branch:master file:^.*\.txt$' would send you email notifications only for | |||
changes in the master branch that touch a 'txt' file. | |||
It is common that the members of a project team watch their own projects and | |||
then pick the changes that are interesting to them for review. | |||
Project owners may also configure notifications on project-level. | |||
</pre> | |||
== Upload content using git == | |||
See [https://forge.etsi.org/wiki/index.php/How_to_contribute#Push_your_contribution_to_Gerrit Contribute via git] | |||
== Links to documentation == | |||
* [https://www.slideshare.net/dluksza/introduction-to-gerrit Introduction to Gerrit] | |||
Latest revision as of 08:53, 25 October 2017
Upload content with the web interface[edit | edit source]
The example is taken from the NFV Specfest Wiki. Proceed withe the points below:
- Navigate to the project page where you want to upload your contribution, e.g. nfv-specfest
- If required, click on the
Sign inlink on the top right and the page to log in with your EOL or Forge credentials.
- If required, click on the
- Click
Create Changebutton- Enter Branch, e.g. master
- Enter Change topic. Topics are used to gather sets of Changes which are about the same feature. E.g. "specfest"
- Enter the description of the Change.
- Click on
Create
- Click
Editin the File list at the bottom of the page - Click
Addto insert a new modification in a file- Type a file path (folder and filename, e.g. "upload/jon_snow.yaml") and click
Openbutton.
- Type a file path (folder and filename, e.g. "upload/jon_snow.yaml") and click
- Copy the content you want to submit and paste the content in the newly created file.
- Click
Saveand then clickClose - Click the blue
Publish editbutton and then thePublishbutton on the top right of the page.
Enable notifications from specific projects or branches[edit | edit source]
Notification from changes in projects are configured via the Watched projects page, available in the Settings.
Find more information at Gerrit on Watched projects documentation. An extract:
To get to know about new changes you can watch the projects that you are interested in.
For watched projects Gerrit sends you email notifications when a change is uploaded or
modified. You can decide on which events you want to be notified and you can filter the
notifications by using change search expressions.
For example 'branch:master file:^.*\.txt$' would send you email notifications only for
changes in the master branch that touch a 'txt' file.

It is common that the members of a project team watch their own projects and
then pick the changes that are interesting to them for review.

Project owners may also configure notifications on project-level.


